Showing posts with label crafts. Show all posts
Showing posts with label crafts. Show all posts

my daughter's lalaloopsy party
has a sewing theme to it.
and since doilies have a lace look to them,
i thought the doily pom pom balls
i saw on pinterest were perfect.

i followed the link but could not find a real
tutorial on how to make them.

since i had made these cupcake wrapper pom pom balls last year,
i had a pretty good idea how to try and use the doilies.
you will need doilies, food coloring, a ball & hot glue.
i looked for colored doilies,
but if i had known how easy it is to dye the doilies
i wouldn't have wasted my time. so easy!

fill a dish with enough water to cover the doilies
and add a few drops of food coloring.
{i used pink from the neon collection.
i thought i might have to add more but i didn't.}
put the doilies into the water.
{i just dropped the bunch in, didn't separate them at all}
it worked really fast! just a minute or two to soak.
{it takes awhile to separate them and lay them out
and if they sit too long they start to rip.}

lay them out to dry.
{i just had paper towels spread out on a table.}

as they start to dry move them around
to get off of the wet part of the towels.
{aren't they pretty?!}

once they are dry
{mine were dry a few hours later, but i waited til the next day}
fold in half and put a dab of hot glue
towards the center but near the fold.

fold in half again

put a dab of hot glue on the corner and press down onto the ball.
{you could probably get away with an even smaller ball}

continue to do this around the ball
{you want the folds to be going different ways
so that the doilies open into each other
instead of forming rows.}

notes...
i think i could've spread them out more.
the ball shows through but if you go back and use double sided tape
to stick the doilies together it solves that problem.
mine was much fuller than the inspiration picture,
but i like that in the original you can see more of the doily.
i ended up using about 30 - 8 inch doilies.
i'll have better pictures when i post all the party details!!

I just love pinterest for finding great inspiration.
this christmas i have updated
my decorations with a few of these ideas.
burlap bubble wreath

i love it and it was not that hard.
i had pinned this wreath in the fall,

but it was too late to be making a fall wreath
so i added pinecones dusted with glitter.

i followed the tutorial and it took about an hour.
the most time consuming part is cutting the burlap.
i had lots left over from my sister's shower,
but it does take a lot of 4 inch squares. she said about 100.
i didn't count... and you'll need a lot of pins!
advent calendar
i really wanted a way to help instill
the true meaning of christmas in my kids.
but in a fun way.
i searched advent calendars on pinterest
and found so many wonderful ideas.
i decided to do a mix of winter/holiday fun as well as
acts of kindness & thinking of others.
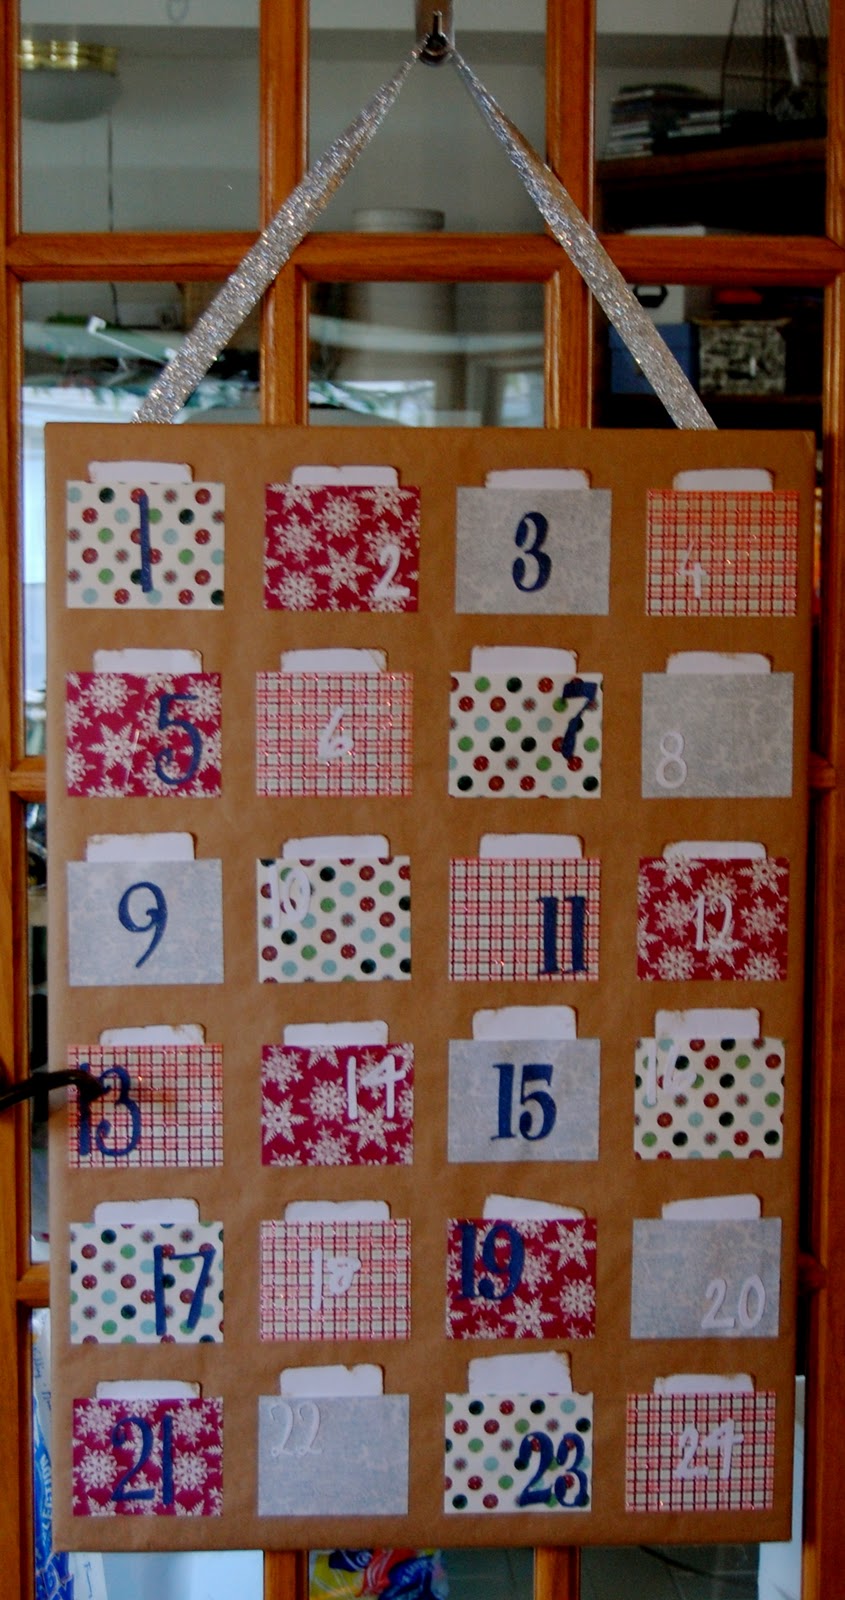

color a winter picture ~ make a card to put
with gift card for the mail carrier~write a note to your
sister telling 3 nice things about her~read a christmas
storybook~make a card for your busdrivers~
make cookies~have a snowball fight~go to starbucks
for a treat~make a sign for the garbage man and
attach a gift card~make a snowman~look at
photo albums~make a card for your REP teachers~
watch a christmas movie & have popcorn~go see
christmas lights~make a winter craft~draw a picture
of baby jesus~make cards to send to
great-grandparents~buy a gift for toys for tots~
help wrap christmas presents
{i put a few of these in more than once}

ruffled tree skirt
{this is more of a blog find}
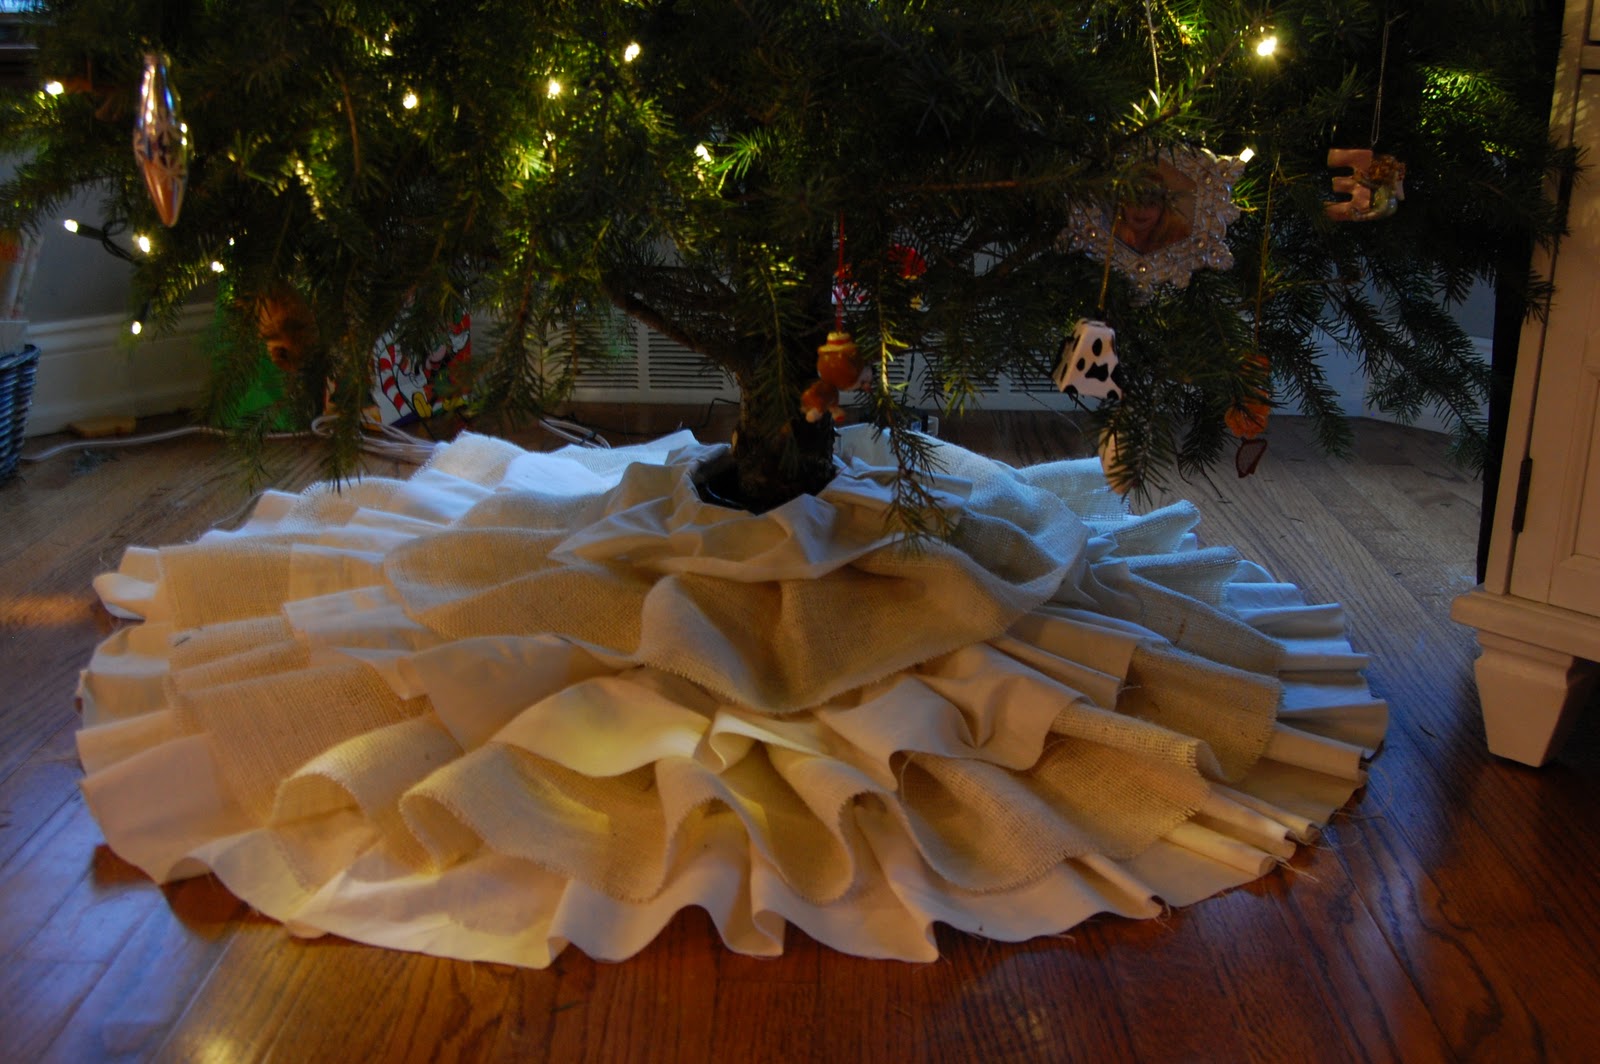
i used burlap and muslin because i love a natural look.
i had seen this tutorial last year

their skirt was sewn,
and i was all ready to follow their instructions.
i had planned on pulling the sewing machine out....
and THEN i saw this tutorial!
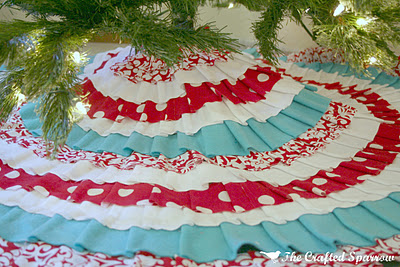
wait, what? i can do this with a glue gun?!
done!

happy holidays!

i just LOVE pinwheels!
they are so pretty and colorful.
i figured they would be great
for our girlie outdoor evening party.
there are so many different
tutorials on how to make them.
since i took bits and pieces from all
the great advice,
i wanted to share what i think
is the most easy and pretty way to make them.

you will need:
coordinating papers
spray glue
long pearlized straight pins
glue gun
small beads
lollipop sticks - 8in & 4in (for dolls)
push pin (did not make picture)

first spray the back of one paper generously with spray glue.

place other page on top

trim to 5 inch squares


cut from one corner towards the center.
i just eyeballed it, others may want to fold diagonally
to create lines to cut on.

all 4 cuts made

put a dot of hot glue in the center and fold one corner in.
hold till dry.

repeat until all four corners are folded in.

this is the part that varies in each tutorial.
i used a pushpin to create my hole.
it is strong, so easy to push through and it creates
a hole that is a little bigger than the pin
so the pinwheel will spin easily.

stick the pin through the hole.

add 3 small beads
(this helps keep the pinwheel away from the stick)

put a dab of hot glue on the end of the lollipop stick
then slide the pin into the middle of it.

bend the pin so that the pinwheel is facing forward
instead of up.

pretty, right?

for the doll version, make a 3 inch square
and use the 4 inch lollipop stick

all ready for the party!

i am currently obsessed with pinterest.com
there are so many great ideas!
i came across this one

for chore dice the other day
i definitely wanted to make some!
i changed up the idea a little bit.
my kids are currently very motivated
to earn money.
so i decided to add that in.

first i bought 3 unfinished wood blocks from the craft store
{my daughter helped paint them}

then i printed out the square labels.
{it's unfortunate that i misspelled vacuum for the millionth time}

once the labels were cut,
it was time to assemble using
modge podge.

my daughters wanted them to be sparkly,
so we also added glitter
{just make sure you do
another layer of modge podge
or else you'll need to add "clean up glitter"
to the chore list}
so far it is working really well!
we made one block "before dinner chores",
the second "after dinner chores" and
the third block has the amount of money
they get for each chore.
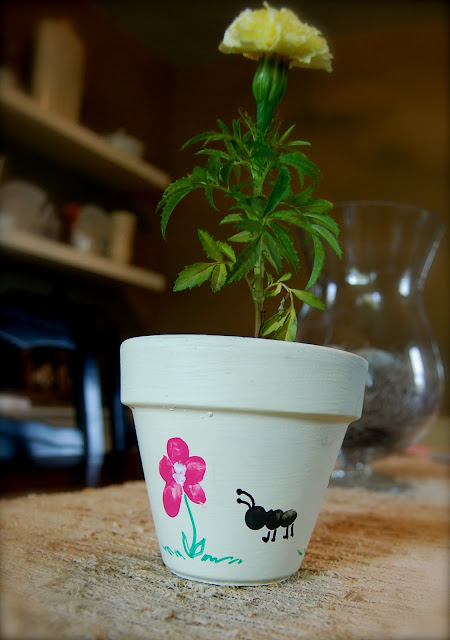
this is an easy,
kid friendly
gift for grandma.

i got lucky and a local garden center
had these pots
(already painted and including a plant)
for just $1!

i wanted the kids to personalize them for each grandma.

each kid made a flower and ant body with their
finger print. (i used acrylic craft paint)

then i added the stem, grass, legs and antennae
you can't tell, but the post has 3 flowers and 3 ants.
one for each kid.
i still want to have them each write their name by their ant/flower.

my daughter LOVES bunnies!
so as you can imagine,
this time of year is a big deal for her.
i saw this bunny banner the other day

and knew i had to make something like it.
i went to my favorite standby...burlap.
i printed a bunny shape that i liked,
cut it out, and traced it 6 times on the burlap.

next i threaded some
blue baker's twine
through the bunny ears.
{later i added the bows}

for the bunny tail,
i hot glued a huge
white pom pom.

i think they are pretty cute!
i'm debating {with myself}
about backing each bunny with some
cute fabric just too add a little
more color...or do i
like them more natural....
Subscribe to:
Posts (Atom)

Social Icons