Showing posts with label camping party. Show all posts
Showing posts with label camping party. Show all posts


my daughter's birthday is in february,
which means she is the only one who has to have indoor parties.
indoor parties mean less guests.
i always feel bad about that, so i try to make her party extra special.
i think this was my favorite party yet.
she wanted to do indoor camping.

i didn't want to do the whole "glamping" craze that most
girl camping parties are leaning towards.
we decided that we would focus on s'mores.
i used the colors from s'mores
plus pink to make it a little more girlie!
bear with me, because pictures indoors at night are not the greatest.
....................
the invite

the invite was a tent which opened to show party details.
for all the invite info see my original post...including a tutorial!
....................
the cake

let's start with the cake because it inspired the entire party.
i had seen this cake on a great blog called the birthday blog.
it no longer exists, but i had talked over email with the blogger,
stacy, a few times so i contacted her and asked for the directions.
she was so helpful and has since reposted many of her cakes
on her other blog: not just a housewife.
go there for her fantastic instructions!
.....................
the food


i don't like to have a ton of desserts for the kids, so besides the cake
we just had a couple treats.
i made these s'more bars which are one of my
favorite desserts ever. seriously. make them.
but take them somewhere to share or you will eat an entire pan.
just trust me on this.
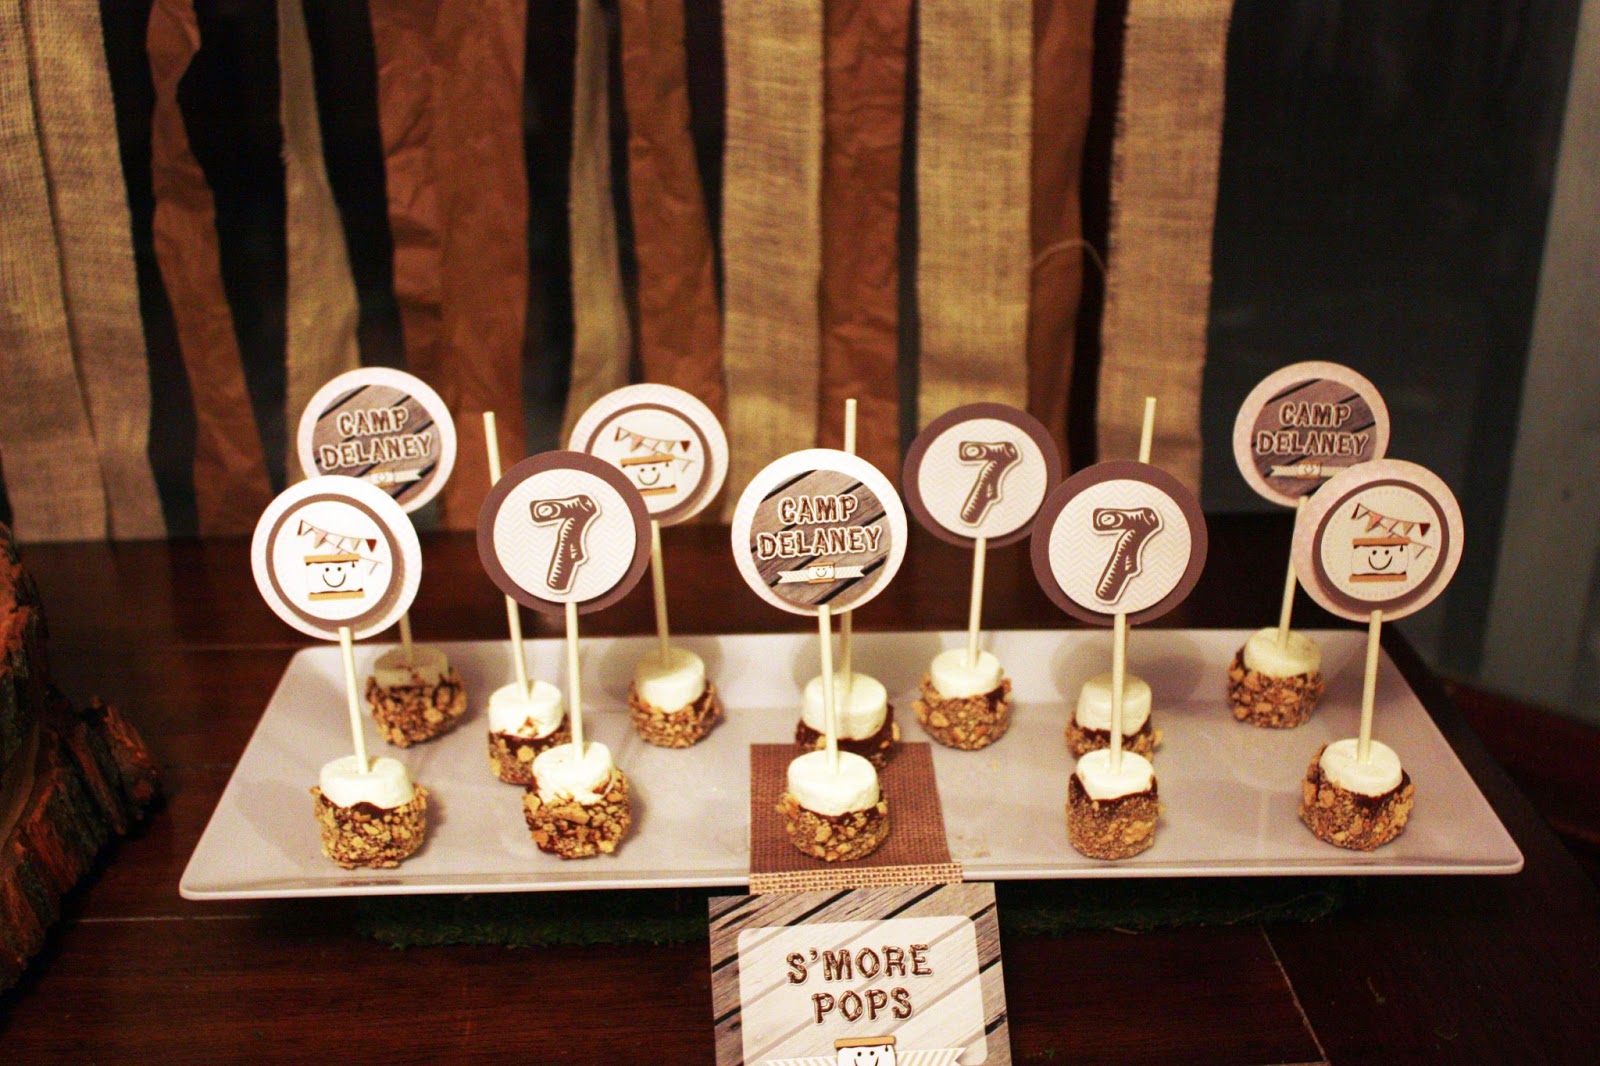
i also made s'more pops. these are always a favorite.
and easy.
dip a marshmallow in melted chocolate chips or hershey bars
then roll in crushed graham crackers.
let set and that's it! yum!

just one more look at that cake!


i also served tortellini kabobs with 3 dipping sauces for the moms.
somehow i never got a picture of that.
the kids had pizza.

some of my friends make fun of me for decorating drinks,
but i think drink tags are my favorite and most useful
party goods. i can't stand using a million cups
or finding half full bottles of water.
this way, the kids always know which cup is theirs!
plus, how cute are they?!

then we had a make your own trail mix bar.
the kids could combine raisins, bunny grahams, m&m's,
mini marshmallows, pretzels, chocolate chips and dried bananas.
they could also take some "pond life" gummies:
butterflies, turtles & frogs.
spoiler alert: all that was left were raisins and bananas.

in one of my crazier moments, i made marshmallow garland.
pulling a sticky needle through marshmallows was about the time
i decided i may need to go to party planning rehab.
cross my love shop on etsy let me borrow her cool,
rustic wood risers which were perfect for the display.
....................
other decorations

welcome sign

the backdrop behind the food table
was made with strips of burlap and brown bag wrapping paper.
the bunting was various colors from the party
(mimicking the bunting design used thought the printables).
pink herringbone, wood, browns, pink dot

found this beautiful wood cutout frame at michaels
and painted it with martha stewart gray chalkboard paint.
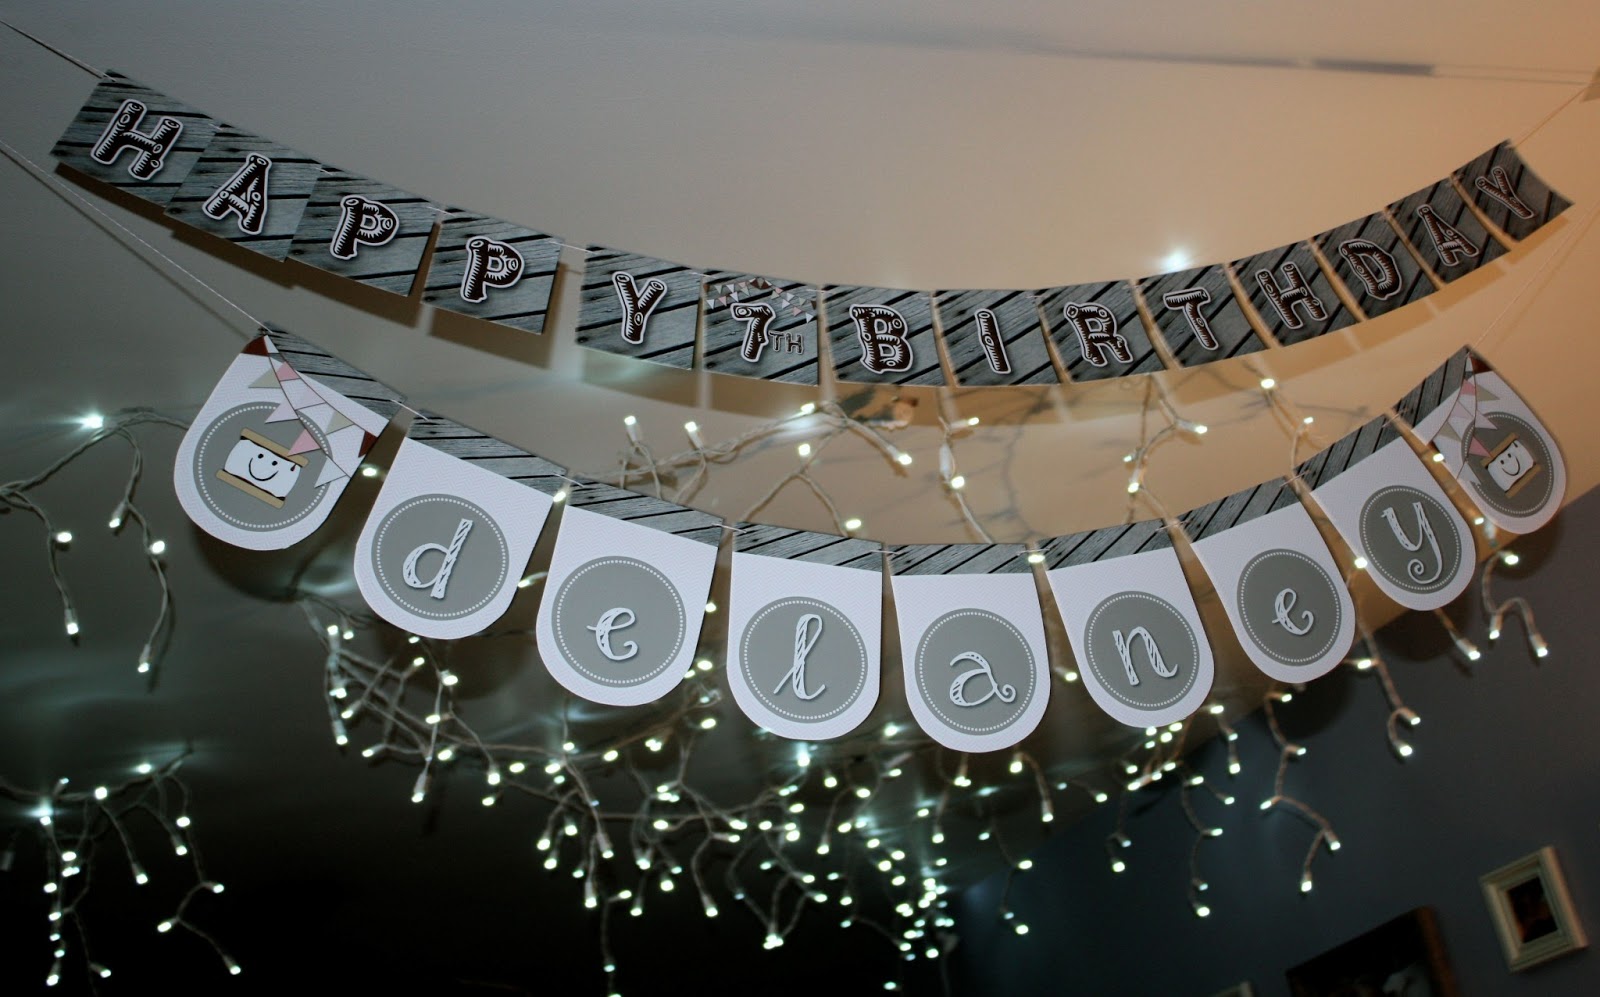
banner and "stars"
we hung icicle christmas lights from the
ceiling using tiny command hooks.
it looked awesome!

faux campfire

i used some real birch logs we had.
then crumpled red, yellow & orange tissue paper in between.

in the center of the logs was a string of red rope lights.
(found this at hobby lobby)
...................
activities

i bought wood beads at hobby lobby
and the girls decorated them with sharpies.

then we strung them on necklaces.

i made these cute bracelets from popsicle sticks!
the girls also decorated these with sharpies.
i followed this tutorial on how to make the bracelets,
but there are a few links on my pinterest board.
i took a bit of advice from each one.

then each girl made a sleeping bag for their doll.

i had started the fleece tie bags but left the top for them to finish.
this was also their party favor.
it would've been super expensive,
but fleece was over half off and my mom had
a teacher discount at joanns so i got the fleece for 75% off.
they were easier than i thought and very cute. go here for the instructions.

then we had a bunny hunt.
my daughter loves bunnies. this was her idea.
my other daughter thought it would be fun to have the girls earn
badges like you do in girl scouts,
so i also incorporated that into this game.
i made little bunny badges and hid stuffed bunnies around the house.
when they found each bunny,
there was a bunny badge for their "sash"
(streamer wrapped over their shoulder)
and a clue to the location of the next bunny.

this is the only picture i have of the bunny badges and sash.

then we watched a movie.
oh, did i mention that my sisters and i MADE these tents?!
aren't they adorable?
actually very easy when you have one sister that sews
and another with fancy drill bits.
this tutorial was very helpful and easy to follow.

the dolls had fun too.
(their fire was made from toilet paper rolls and tissue paper)

on their way out each girl took a s'more kit.
"thanks for making my party so much S'MORE fun!"


i will be selling printables for recreating this party in
my etsy shop
(until they are listed,
just send me a message though my shop to get pricing)
i'm adding some additional pictures below
(with much better lighting!)

cucpake toppers
(or i used them for the s'more pops)
these come with the 3 front designs as well as the
3 different backgrounds (pink dot, pink herringbone, & brown)


banner
the banner that will be included in the printable package will be this
"delaney" banner, but it will say "happy {age} birthday"

funny story about this s'more guy.
my daughter got a s'more charm that looked just like this.
she said "mommy, you should use this as the picture on my banner."
little party designer in the making!
update: pictures of the happy birthday banner


for my daughter's camping party,
i decided to make tent invites.
there are many versions of these on pinterest and you can see my
main inspiration on the my camping party pinboard.

today i am going to show you how to make a tent invite.
i will be selling the pdfs of these invites in my etsy shop,
so once you have them printed you can just follow these steps
to creating the final product.
your daughter, her friends {and her friends' parents!}
will be very impressed!
.................
you will need:
a straightedge ruler, cutting mat and an exacto knife

first, line up the ruler with the point of the tent and
straight down the middle.
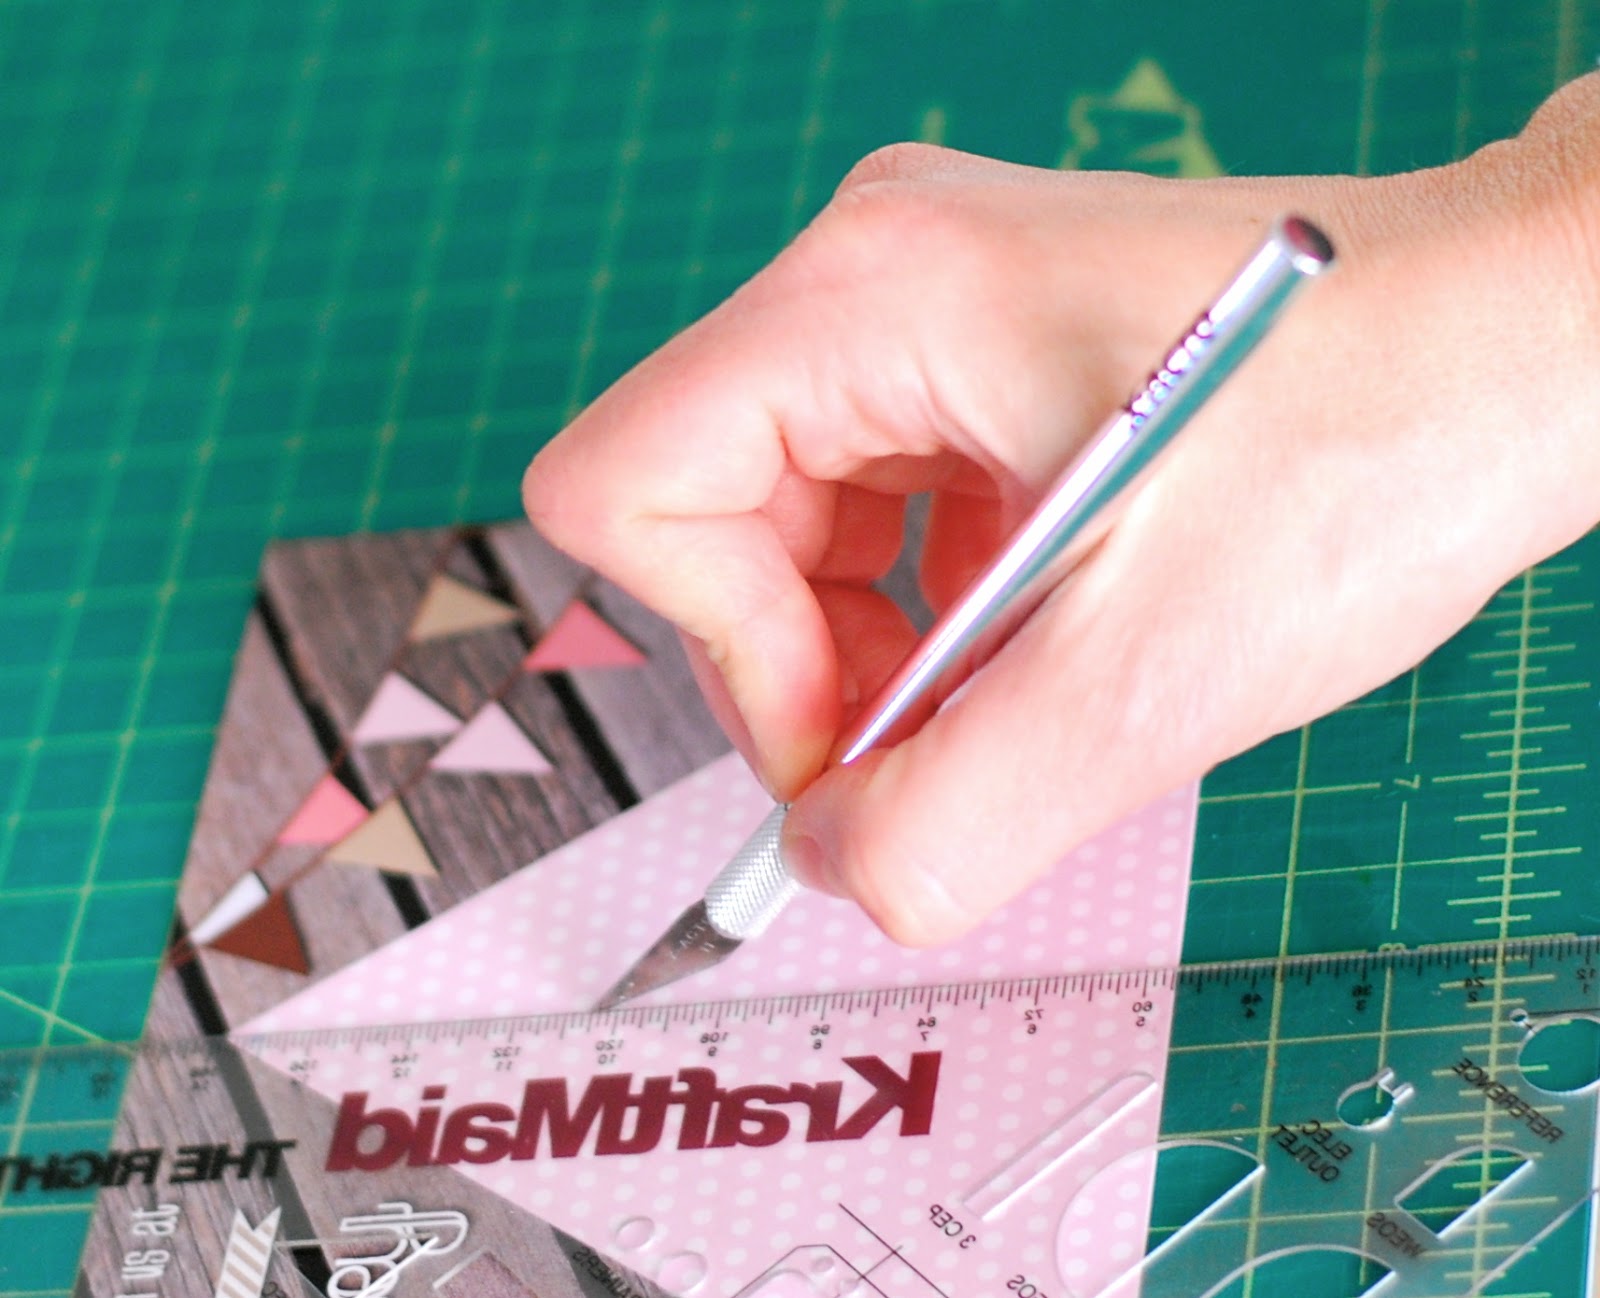
next, (starting about an inch from the point) make your cut
straight down.

this step will help you get the perfect fold - like scoring.
line up the ruler with the top of your slit down to
one corner of the tent.
then using the flip side of the knife blade, lightly drag it to the corner.
start super light because you can always go back and do it again.
you just want it scored, not cut or damaged.

using the ruler to create the perfect fold,
lift and crease the tent flap back.
repeat on the other side.

i didn't take a picture of the wording page,
but you will glue the tent page directly on top of the
wording page making sure all the sides and corners line up.
(the pages are the same size so this is very easy)
i use tombo mono multi liquid glue. (green cap)
they sell it at joann fabrics.
i like it because it holds well and doesn't leave wrinkles.
still, i use it very sparingly- but that's another reason i like it.
i put a thin line of glue around each edge
and along the tent flap folds.
open the flaps and there you have it!

we didn't do fancy labels,
but i printed the return address on the back
and sealed with washi tape
if you are interested in the invite,
visit
i will be selling it as a pdf
and also professionally printed and assembled.
stay tuned for all the party pics...coming soon!
Subscribe to:
Posts (Atom)


Social Icons