i was asked to come up with some ideas
for a going away party.
the client's sister and her family
are moving to london,
so the theme is "london".
i used the flag of england
as my inspiration for the color pallet.
i googled london images
and was really drawn to the color red
in the double decker buses and phone booths.
for a going away party.
the client's sister and her family
are moving to london,
so the theme is "london".
i used the flag of england
as my inspiration for the color pallet.
i googled london images
and was really drawn to the color red
in the double decker buses and phone booths.

1. some patterns i plan to use
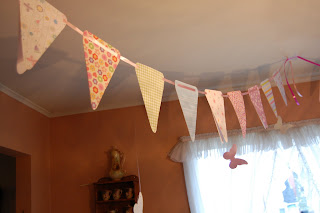
2. farewell banner
3. images i loved
4. option 1 wine glass marker
(a 2 in circle with a label to write name.
the circle has a slit to slide onto the
base of the wine glass)
appetizer pick (done in all patterns)
option 2 for wine marker
(tag with a famous image-ties onto glass.
each guest would get a different image)
5. food labels
my family's card
i am so excited about how these cards turned out!
the pictures don't represent the great
quality of the printing.
i'm so glad i have found a good printer
so that i can create any format i want.
i am so excited about how these cards turned out!
the pictures don't represent the great
quality of the printing.
i'm so glad i have found a good printer
so that i can create any format i want.
front of the card.
it is a 4.75 in square when folded.
it is a 4.75 in square when folded.

according to the printer, this is what you
call a "z fold".
i love the simplicity of having just the photos,
but then making it more festive
with the snowflakes and swirls.
call a "z fold".
i love the simplicity of having just the photos,
but then making it more festive
with the snowflakes and swirls.

i totally copied this idea from another blogger,
but can't find the link!
cute and easy.
i took each kid's thumbprint, added antlers and a red nose.
since i needed about 80, i scanned it and printed them out
on sticker paper. then i used a circle punch to
make it perfect for sealing the envelope---no licking!
later, i wished i had printed the year under it...oh well.
my sister-in-law's cards

she brought me a picture of this idea and
i was really excited to try and replicate it.
i think it turned out so pretty.
i was really excited to try and replicate it.
i think it turned out so pretty.


she decided to go with the green, but i
really love them both.
really love them both.
as a former teacher, it's important to me to
give functional but fun gifts.
this year, i designed stationary for
my daughter's teachers.
who doesn't love beautiful, personalized stationary?
give functional but fun gifts.
this year, i designed stationary for
my daughter's teachers.
who doesn't love beautiful, personalized stationary?

perfect for a quick note home to a student's parent.
"believe" banner
a small banner made from burlap.
a small banner made from burlap.

santa banner
this is a mini banner that i thought would be perfect to hang on the end of your child's bed just to make sure santa knows to stop!
we are refinishing floors, so do not have any beds to model with :(


"hitched" banner
i made this banner for a gift to newlyweds.

 i think having the date added makes it a special memento. hopefully they can hang it up on their anniversary for years to come!
Goldalicious Banner
i can sew. well kind of...
i can make pillow case dresses out of bandanas
(half the seams are done for you!)
and i can make leg warmers out of knee socks.
so i thought... hey i could make a "real" costume this year.
like use a pattern and everything!
stay tuned to see how that turned out...
but first, here are the finished products:
of course she wanted to be jessie
(see why here)

and after a year free of princess costumes,
she begged me for this one
it's so pretty how can you say no?
(& he got stuck as her side kick)
princess & the frog

princess tiana

i felt bad that i was spending so much time on the
other costumes and all she got was a dress
but then i found this hat here on etsy.
i think it's hilarious! and she loves it!
the jessie costume:

i made a braid out of red yarn and hot glued it to the hat.
she is very detail oriented and also requested
a "pull string". of course! (she's just like me)
i used a strofoam ring i found in the floral department at joanns
and wrapped it with ribbon.
then i hot glued the end of the ribbon to the shirt.

for the shirt, i bought a white dress shirt.
i made a template out of paper then traced it out onto the yellow fabric.
i cut it out, used that liquid seam stuff and then
stuck it on with iron on transfer or whatever you call it.
(can you tell i'm an expert yet?)
the i looped some ric ric and hot glued it on.

for the sleeves, i ironed on the the fabric again.
i just sliced the fabric with a craft knife so the button can get through.
i added the ric rac and little yellow loops of ribbon to match jessie's.

heaven forbid, my daughter would have to wear pants,
PANTS!?
so i said i would make a skirt. we had this jean skirt
that was a little too "western" for every day so it was perfect!
the cowprint is a bandana (remember what i said about the seams).
i did have to cut and sew 2 pieces together.
but i decided to leave the top "rough"
you know that deconstructed look is really trendy right now!
i learned how to make a ruffle from My Backyard Eden
then i hot glued it onto the skirt.

finally, the belt is just made out of felt.
they had this nice felt with a design on it too.
the belt is hot glued together,
but i added velcro circles to "buckle"it.
frog:

here is where the story of the pattern comes in.
i looked everywhere for something I could use
for his costume. ( i knew i wanted to use this hat)
but finally i broke down and bought the $10 pattern
(which by the way was 99 cents 2 weeks later...
after my receipt was long gone!)
it was actually for a duck...but i could work with that.
anyway, after pinning/cutting out 8 pieces
and reading that i would have to pin/cut about 12 more,
i decide to veer off the pattern.

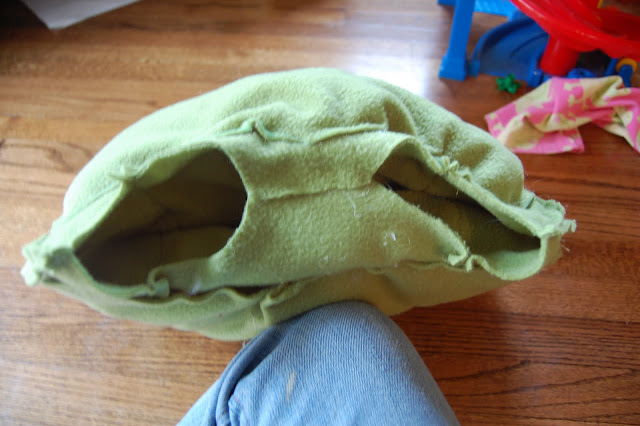
i had the shell done,
so i just cut out a piece of fleece and hot glued it to the inside of the shell.
then i stuffed it with polyfill and hot glued the last side shut.
i did the same thing on the back side.

the bottom was supposed to be elastic, but that involved
a lot more sewing and stringing through the elastic...
plus i thought it kind of looked like a dress.
so i decided to make it more like a onesie.
i trimmed it down on the sides
and cut the shape for the leg holes.
then i hot glued the flaps together.

by this time, i have no idea what i was supposed to
do according to the pattern.
i put velcro circles on the the shoulder straps
(reinforced with hot glue).

and here is the finished product!

onto the feet.
i cut out this shape two times for each foot.
i also cut it out of cardstock.
then i glued them all together (cardstock
in the middle for structure)

i added a ring of elastic to go around his leg
and the velcro on his shoe goes through
the ribbon to keep the foot in place.
i'm so excited with how it all turned out!
i think i learned that i'm not a "pattern" person.
i just don't like all the rules!
i would like to point out that i don't expect that this costume will
last and be passed down to his children like the rainbow bright
costume my mom must have spent
thousands of hours sewing.
but i'm okay with that.
i hope that this inspires other people who don't necessarily have
sewing "skills" to go ahead and try to create
something. sewing machines are great,
but so are glue guns!!
just in time for halloween!
cupcake toppers
for any party or just some family fun!

boo!
these spooky images are backed
with black dotty paper

or orange sparkle paper

these witchy toppers are backed with
black sparkle paper

or orange polka dots

sparkly candy corn cutouts
or candy corn images backed by the sparkle
banners:
trick or treat

i think i will hang this
over my door on halloween.
it's hard to see in the pictures, but
the black letters are sparkly!

trick

or fancy with bows


mini "bunting"


like any of these ideas,
but don't have time to make them yourself?
visit my etsy store here!
Subscribe to:
Posts (Atom)


Social Icons